This guide is intended for users with some Linux experience, and the example is based on Ubuntu 24.04.
For other Linux distributions, adjust the steps according to your actual environment.
If you are not familiar with server administration, use a public server or ask an experienced friend to help with deployment.
1. Connect to the Server
Use any of the following remote tools to connect to your Linux server:
- PuTTY
- XShell
- FinalShell
- Any other remote tool that supports SSH
Once you have logged in successfully, you can continue with the next steps.
2. Download the Server
- Create the working directory and enter it
mkdir -p ~/cloudmap
cd ~/cloudmap

- Download the server package
Two download links are available below. Use the primary address first. If the speed is slow or the link is unavailable, switch to the backup address.
wget https://cdn.vpkiki.xyz/CloudMap/Ubuntu.zip
wget https://cdn.vpkiki.com/CloudMap/Ubuntu.zip

- Install the required components:
sudo apt install -y p7zip-full screen
- Run the following command to extract the server files:
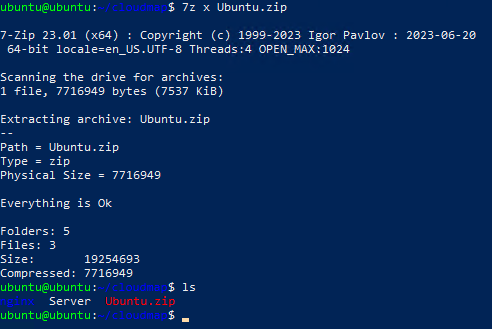
After the steps above are complete, you can start the server.
3. Run the Server
Run the following command to add execute permissions:
chmod +x Server nginx/cloudmap_nginx
screen -S Server
sudo ./Server

After the command runs, the console will output WebSocket and AccessKey.
-
Copy the WebSocket value into the Address field in the menu
Note: the WebSocket address shown in the console may use the local IP, such as ws://0.0.0.0:4001/ws.
You must replace that IP with your server’s public IP before using it.
For example, if your server’s public IP is 1.1.1.1, then the Address field should be filled with ws://1.1.1.1:4001/ws.
Otherwise, the client will not connect correctly.
-
Copy the AccessKey value into the Access Key field in the menu
4. Congratulations, the Setup Is Complete!!
Click here to see how to connect to a private server from the client
If the client cannot connect to the private server through ws://serverIP:port/ws, check the following:
- Configuration: Make sure the server started correctly and is listening on the expected port.
- Firewall: Make sure inbound traffic for the required port is allowed on the server firewall.
- Network connectivity: Confirm that the client can reach the server and that the connection is not blocked by your network provider or firewall.
- Address format: Use the WebSocket address in the following format:
ws://serverIP:port/ws
Example:
ws://1.1.1.1:4001/ws
- Access Key: Make sure the access key entered in the menu matches the AccessKey shown by the server.
5. Configuration Notes
- The configuration file is located in Config.json in the server root directory.
AccessKey: The access key used by the server. Clients cannot connect without it. If the key is leaked, delete this field and restart the server. A new AccessKey will be generated automatically.IP: The IP address the server listens on. In most cases, no change is needed. Only modify it if your server has multiple IP addresses on one NIC and you want to bind to a specific one.Port: The port used for client connections. Usually no change is needed.WorkerNum: The number of worker threads used by the server. In most cases, leave the default value unchanged.- Keep all other fields at their default values.